Drawing
Basic drawing instructions
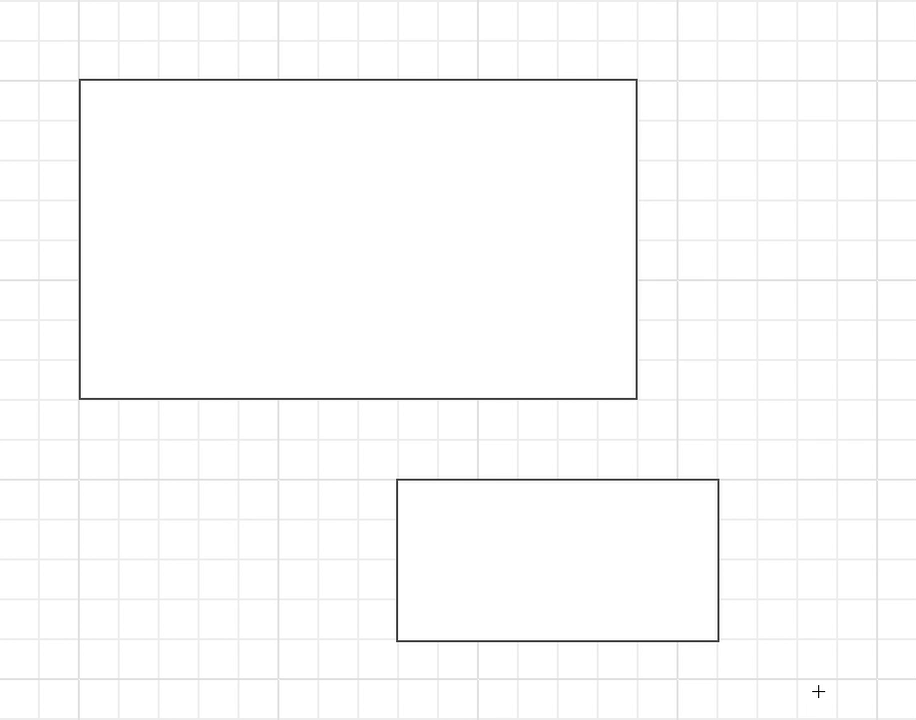
You can draw a new element by clicking and dragging your mouse cursor across the canvas and selecting a stencil from a pop-up menu. The pop-up menu will only present stencils that can fit in the selected area. For example, a vertical scrollbar can only be inserted if you draw a high and narrow rectangle.
Drawing on top of existing elements
There are two ways to draw on top of an existing element:
- When the mouse cursor is over an existing element first press Ctrl key and then click and drag to draw a new element
- If you lock an element you will be able to draw on top of it
Drawing with shortcuts
The process of inserting new elements into your wireframe can be sped up even more by using keyboard shortcuts. After drawing a rectangle with click and drag you can press a key that corresponds with en element that you want to place there. A pop-up menu will appear but in this case you don’t have to click it. If you are drawing a box you can even specify its background color.
Snapping
Smart Guides
Enabling the smart guides allows you to draw with greater precision and speed. Smart guides are temporary snap‑to guides that appear when you create or transform objects on the canvas. If you want to position a new object relative to an existing object smart guides will appear before you start drawing and continue re-appearing as you drag the cursor. Guides appear as the object or cursor approaches the edge or center point of other objects and the canvas.
Grids and columns
Alternatively, to enhance drawing speed and efficiency, you can also display and snap to a rectangular grid or columns. You can control grid spacing and choose between graph paper and dotted styles. Grids and columns are not visible in the preview mode.
Disabling snapping
To temporarily disable snapping hold the ALT key.
To permanently disable this behavior turn it off in the Settings panel.
Editing
Basic editing instructions
Double-click an element to edit it. A context sensitive menu will appear. It contains only options applicable for this particular stencil type.
Selecting multiple elements
You can select multiple elements using one of two methods:
- Click-and-drag from an empty area of the canvas moving the cursor upwards and to the left. A selection rectangle will appear and the elements that fit in the rectangle will be selected. In other words, drag-select works just like creating elements but in one direction only. Dragging the cursor in other directions will lead to creating an element.

- Click holding SHIFT to select additional elements
Locking
To lock or unlock an element select it and click Lock/Unlock button in the toolbar. Alternatively, press Ctrl + L.
Pages
Every stencil can be turned into a link that will lead to a different page (in the Preview Mode).
Creating a link
- Select an element
- Click Link Pages button in the toolbar, click Link in the context menu or press Ctrl + K
- Select the page you’d like to link to from the pop-up menu
Removing a link
Removing a link involves all the steps mentioned above but instead of selecting a page from the list you need to select None.
Master pages
Elements that will appear multiple times across different pages do not have to be repeated on each of them. Instead, they can be added to a master page. Master pages can be applied to regular pages in order to display both their original content and the recurring elements of the master page. When a master page is updated the changes will automaticaly be applied to all pages assotiated with this master page. It is a good solution for creating and managing headers, sidebars or footnotes.
Creating a master page
To create a master page click the “+” button on the “Master Pages” tab of the sitemap. Alternatively, an existing page can be converted into a master page by clicking “Convert to master page” in the context menu.
Applying and removing master pages
To apply a master page to a regular page use the context menu that will become visible after right-clicking the page name or clicking the colon icon. After hovering “Master pages” menu item a list of available master pages will appear. You can apply or remove a master page by checking or unchecking the checkbox next to the master page’s name.
Multiple master pages can be applied to a single page. Also, a master page can be applied to or removed from all pages at once using the context menu available in the master pages list.
Arranging master pages
A master pages can be displayed behind or on top of the elements on the page it is applied to. Right-click a master page on the canvas to display a context menu with the available options.
Master pages can also be dragged around the canvas to adjust their position on the active page. To be able to do that you need to select a master page first by clicking it on the canvas. A master page can be positioned differently on each page it is applied to adopting to their dimensions and contents.
Exporting
You can export wireframes to a PDF file or a series of PNG files. You can export all pages at once to one file or zip archive or export selected pages.
To export your project you need to:
- Click the Export/Share icon in the main toolbar
- Select your preferred format and page range and other options;
- Click the Export button
You can include the device template (browser, tablet or mobile) in the exported files or not. For Png format you can also specify the resolution of the produced images. Your pages can be exported as @1x or @2x raster images.
Keyboard Shortcuts
Drawing
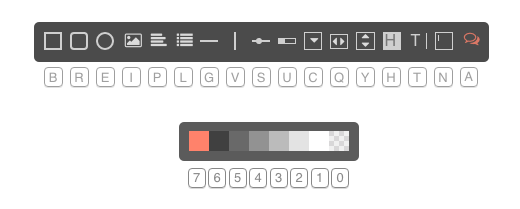
Instead of selecting a stencil by clicking an icon in the pop-up menu you can press one of these keys:
- B Box
- E Ellipse/Circle
- I Image
- X Icon
- P Paragraph of text
- L List
- G Horizontal line
- V Vertical line
- S Slider
- U Progress-bar
- C Combo box/Drop-down
- Q Horizontal scrollbar
- Y Vertical scrollbar
- H Header
- T Text
- N Textarea
- A Annotation
Colors
These shortcuts can be used while drawing (to create a box with a given background color) or editing (to change background color of a selected element).
- 0 Transparent
- 7 Tomato
- 1 … 6 Greyscale
Editing
- Click Select
- Double-click Edit
- Right-click Context menu
- Ctrl + C Copy
- Ctrl + V Paste
- Ctrl + ↑ Bring forward
- Ctrl + ↓ Send backward
- Del Delete
- Ctrl + L Lock/Unlock
- Ctrl + G Group/Ungroup
- Ctrl + K Link
- Ctrl + Z Undo
- Ctrl + Y Redo
- Ctrl + S Save
- Ctrl + Shift + ↑ Bring to front
- Ctrl + Shift + ↓ Send to back
- Alt + 0 … 7 Change border color
- Ctrl + 1 … 3 Change stroke width
- Alt + Ctrl +Drag Duplicate
contact
If you have any questions you can send an email to info@wireframe.cc